October 6, 2022
About the Author: Cameron Hayes
The Basics!
So I suppose the most logical place to start your guitar journey would be at the beginning (duh!) with the basics! You would think that this would be fairly obvious, but you’d be surprised how many people skip over the core fundamentals of playing the guitar because they are in a rush to learn their favourite songs! I always start every first guitar lesson with: the body parts of the guitar, the open string names, basic fretting technique and basic strumming technique. These fundamentals are extremely important to get right in the beginning to then build upon later down the track.
So many students that have come to me for lessons that have perhaps been playing for a few years (or longer!) couldn’t even tell me the open string names on the guitar, which makes the process of explaining new things to them more difficult and time consuming. The way I explain it is with a simple rhyme, which although sounds a bit childish, most definitely works to help you remember! That rhyme is Elephants And Donkeys Grow Big Ears. E for Elephants being the low (thicker) E string and E for Ears being the high (thinner) E string. Going through this a few times and mixing up the strings will make explaining new things to a student much easier, since I can just say “put your 2nd finger on the 2nd fret of the D string” and they’ll know exactly where that is without hesitation.
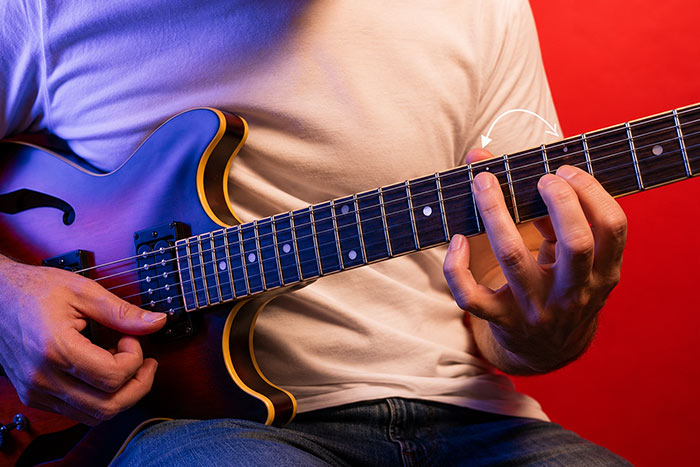
Another thing that I’m always shocked to learn with some students is that they have no idea where in the fret they should be placing their fingers when fretting notes. Most people (wrongly) assume they should be placed in the middle of the frets, and I’ve even heard of other teachers telling them that this is where the fingers should go. Well let me clear this up now, this is wrong. When fretting notes, the fingers should always (*99% of the time, more to come…) be placed just behind the fret. Not right on top, not in the middle, just behind. This will produce the clearest sound and require the least amount of pressure to play a clear clean note that will sustain.
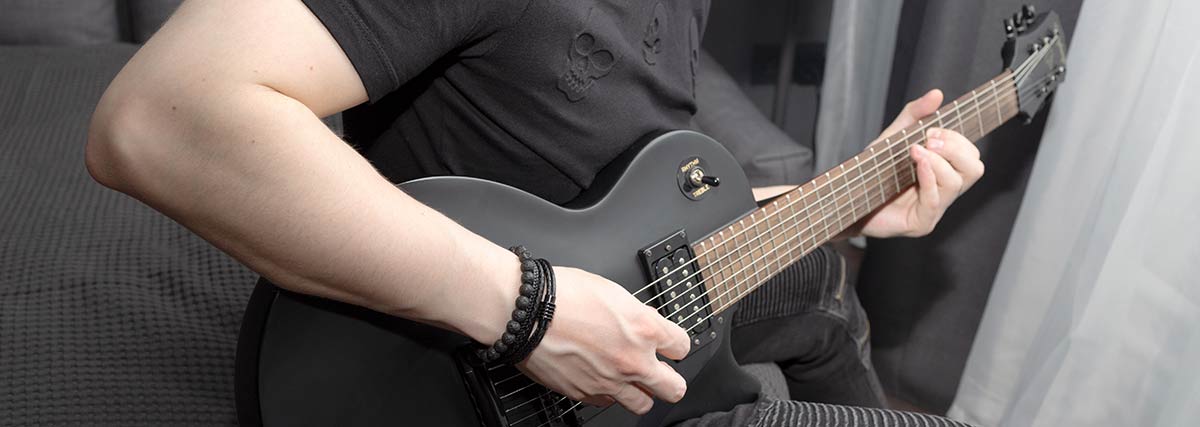
Once they start practising fretting a random note (I usually start with the 1st fret on the low E string) this is usually a good time to talk about the basic right hand strumming or plucking technique. If the student has never used a guitar pick before (and perhaps doesn’t have any) I will usually start them off with just plucking the low E string with their thumb in a downward motion. If they are a bit more experienced with picks, then I’ll encourage them to strike the plectrum over the string in a downward motion. The way that they hold the pick is important too, not too much of the pick sticking out that it becomes awkward and also holding it in a way that doesn’t put the wrist at an awkward angle.

Some Simple Riffs…
Once they have gotten the hang of the basics, it’s time for a few simple tunes to get them playing something that they would have heard before! The classic to start with is “Smoke On The Water” by Deep Purple, which I usually just show them on the low E string since I usually start talking about fretting technique ect. there, but is more correctly played on the D string to be in the same key as the original song. I always encourage (even enforce) them to use different fingers to play this in the left (fretting) hand. Another sign of bad technique that makes me shudder anytime I start teaching a new student is when they like to play everything with one finger in the fretting hand (usually the 1st or 2nd finger since these are naturally the strongest). For “Smoke On The Water” for example, you should use your:
1st finger on the 3rd frets
3rd finger on the 5th frets
and 4th finger on the 6th fret.
This will allow your hand to stay in one position on the guitar neck which prevents you from having to make more unnecessary movements.
Some other good simple riffs to get you started are “Sunshine of Your Love” by Cream and “Seven Nation Army” by the White Stripes.
Open Chords
Once the student gets the hang of a few single note riffs, this is usually a good point to move onto some simple open chords. Open chords are named since the notes are played in the open position of the guitar (closest to the nut/headstock – see, learn the body parts as well!) and incorporate the open strings around other fretted notes. There are a collection of simple open chords that if a player knows, can probably play 90% of songs in existence (in the popular music world anyway).
I usually like to start with a specific song in mind to work towards when learning chords. For arguments sake, let’s choose “Stand By Me” by Ben E. King. For this song I first teach the student how to play the chords G, E minor, C and D (played with a capo on 2nd fret to be in the same key as the original song), both from mimicking my fingers and also from reading chord diagrams. I will also spend a moment explaining how to read the chord diagrams, since they will need them when they get home if/when they forget the shapes. Once they have the shape in the fretting hand, they can just strum a simple strumming pattern to make sure that all of the strings are ringing clearly. I usually start with one strum per bar to focus on the fretting hand, later introducing more down and up strums to give the chords more rhythm.
*Sometimes for chords we need to break the rule about placing your fingers just behind the fret. For an A chord for example, there just isn’t enough room to have all three fingers behind the 2nd fret, so the finger that you have placed on the D string will fall onto the ‘incorrect’ side of the fret. This is unavoidable, but just shows how important strong fretting technique will be in these situations to still produce a clear sound.
Power Chords
After perhaps a few simple songs using single note riffs and open chords, it is usually time for the student to graduate to the power chord! The power chord is the staple of many genres of music, most notably rock music and its surrounding styles. I start by showing them the power chord shape (usually on the 5th fret of the low E string, since the lower frets are a bit too spread out to start learning there) to then slowly shifting around different frets and also playing it off of the A string. From there I like to look at a few songs that use the power chord. A good place to start is the chorus of “Sunshine of Your Love”, which if they have been learning the main verse riff of already may be a good tune to start off with!
The classic power chord tune though has to be “Smells Like Teen Spirit” by Nirvana, which has that absolutely iconic and recognisable intro. Whenever I say to a student “have you heard Smells Like Teen Spirit by Nirvana” they’ll sometimes say “uuh I’m not sure, maybe..” then I’ll play it to them which results in them yelling “yes YES I’ve heard that!”. This is a great riff since it swaps from both playing the power chord off of the low E and A string, and shifts positions on the neck quite quickly, whilst also incorporating a specific strumming pattern using some up strokes. This is a great tune to learn overall, including the guitar solo which also introduces a student to bending! But for now let’s focus on the power chords…

RELATED POSTS